 |
| Blessing Box folded from an expired greeting card. |
Historic folk songwriter and singer Pete Seeger passed away this morning at the ripe old age of 94. Known as the father of folk music. Mr. Seeger was historically against McCarthyism and also known to march with Rev. Dr. Martin Luther King Jr. His influence can be found in the music of several artists from Arlo Gutherie to John Mellencamp. Malvina Reynolds wrote the song "Little Boxes" in 1962 before allowing her friend, the late Pete Seeger, to make it a hit in 1963.
It's a rather macabre song referring to the housing developments in Daly City, California. Houses made from shoddy materials in cookie cutter fashion. People living, acting, and reacting exactly the same.
"Little boxes on the hillside,
Little boxes made of ticky tacky,
Little boxes on a hillside
Little boxes all the same,
There's a green one, and a pink one,
And a blue one, and a yellow one,
And they're all made out of ticky tacky,
And the all look just the same."
I heard this song for the first time on NPR today and it got me thinking.
I urge you NOT to live like those in the "Little Boxes" but to stand out. Don't be the same. Be different. Stand up for what you believe in. Like the great Pete Seeger, be yourself and the right people will love you for it.
I urge you NOT to live like those in the "Little Boxes" but to stand out. Don't be the same. Be different. Stand up for what you believe in. Like the great Pete Seeger, be yourself and the right people will love you for it.
However since we are talking about little boxes let me teach you a simple little project. Remember those expired greeting cards hogging up your shelf space? Instead of throwing them away here is a little something you can do with them.
Blessings Boxes.
I fold each of my family member's a little box using our received Christmas cards. Each of us then writes down 10 things we are grateful for over the last year. Slip the list into your respective boxes then attach an ornament hook and hang it on the tree. When the ornaments get packed away so do the boxes. Next year take a peek into them see what everyone else was grateful for. Also look back at boxes of Christmas Past and see how your lives have changed.
I call them Blessings Boxes but they really are anything boxes. I gave my niece a necklace this year in a box I folded myself so don't get pigeonholed to Christmas. After all, Chinese New Year is Friday, then there's Valentines Day...
Here you go....let's get our Origami on!!!
Things you will need:
Expired greeting card with the main part of the front design pretty centered
Ruler
Pencil
Scissors (optional)
Elmer's glue (optional)
The first thing you will need to do is to cut your card to the required size and shape centering your best design front and center. Cut your back portion 1/4th of an inch smaller all around than you did the front.
Next step is to draw an X corner to corner. This helps find the true center. Resulting in nice pretty folds.
Take one corner and fold to the true center of your card.
Unfold your first fold and make another fold to the crease. Centering the point on the line.
Now fold it over on itself
And over on itself again.
OK now undo all your folding. Seems silly I know but stay with me.
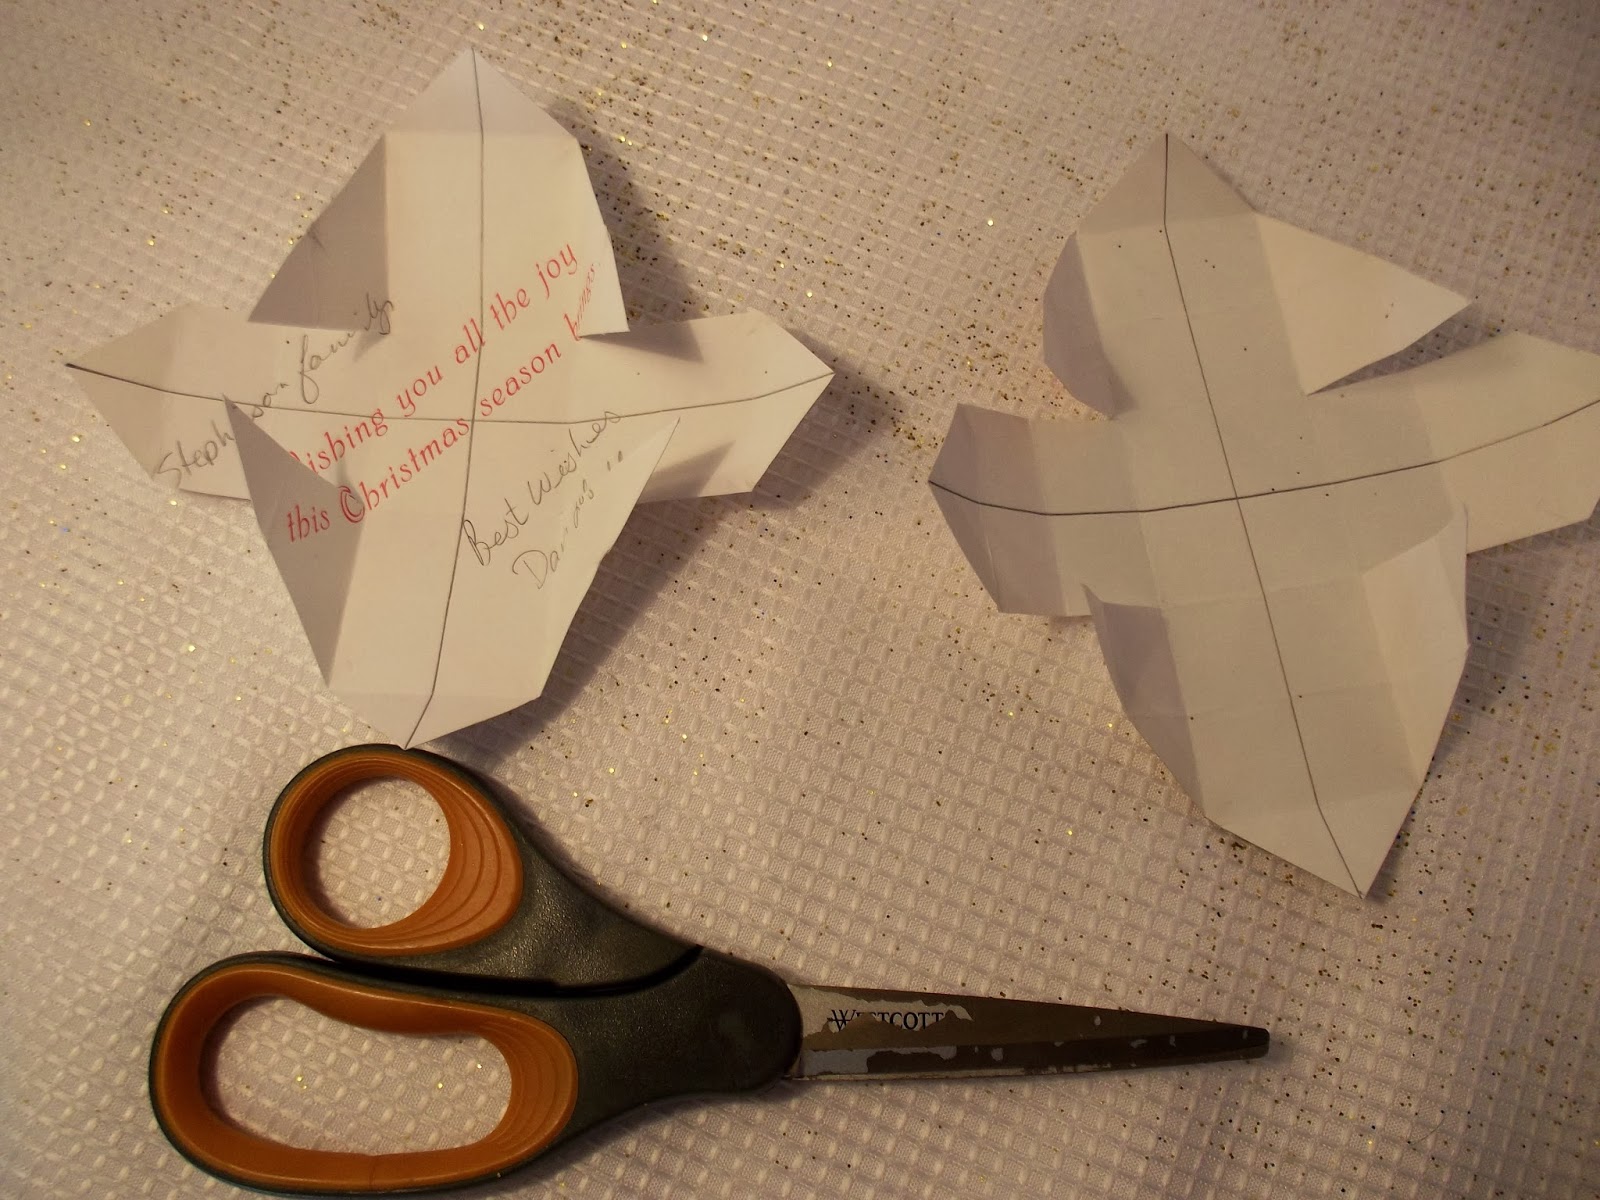
Mimic the previous steps on the 3 remaining corners. You should end up as I have here.
Do the same to the rear of the card so they both look the same.
Take your scissors and make four cuts in your box as I have done below. Be careful not to cut to the center but only as far as the last fold. True Origami Art decries the use of cutting tools or instruments but encourages "careful tearing". Since I'm not good at "careful tearing", and I like good clean lines, I'll go for the scissors everytime.
Now fold the point up again
and over on itself again
fold your points in
fold the ends up and stand the edges. Following the same steps on both sides. Making the beginning shape of your box.
Carefully fold your skinny edges up and tuck in
Do the same with the other side and voila! You have a top, almost.
Repeat these steps with the back of your card to create to box bottom. When your done the top should fit snuggly over the bottom.
Now measure and cut blank portions of card from your scraps to fit inside the top and bottom of your box.
Secure with Elmer's glue if needed and allow an hour or so to dry.
Congratulation Friends!! You have just folded your first Blessings Box!
I hope you enjoy these little trinkets as much as we do. They're cute and fun as well as easy to make. They also come in handy to store jewelry in on road trips or for giving little gifts to friends and family.
These little treasure keepers can be made out of greeting cards or any card stock. Try folding them out of card stock with balloon designs then give them as party favors at a birthday. What about baby shower designs....
Possibilities are like Nebraska...Endless!!!
Happy folding,
Barb


No comments:
Post a Comment